

Written by Stephen Day
Gas Safe Engineer
Updated: 11th December, 2025
If you’ve noticed your energy bills rising recently, this could be down to a number of reasons. Sludge in your radiators can prevent your radiators reaching optimal temperatrue, causing you to turn the thermostat up unecesarrily.
When your radiators have cold spots, it requires more energy to heat the room.
Get a quote in 60 seconds, fitted as fast as next day!
0% APR finance available.
If your radiators are cold at the bottom, this is likely as a result of a build up of sludge. Whilst it is possible to clean them yourself, it’s usually better to get this done by a professional who can clean them properly or perform a powerflush if required.
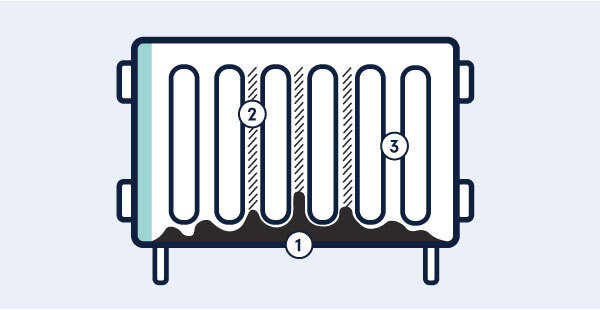
Radiator sludge is a mix of dirt and rust. The sludge can build up over time and begins to gather at the bottom of radiators.
The sludge can prevent water running through your radiator evenly, causing cold spots, and a decrease in efficiency.
Commonly, it is not the entire radiator that remains cold. There will be a mixture of warm and cold spots across the unit.
If you do want to attempt to remove the sludge from your radiators yourself, which we would not advise, these are the steps of the process:
Turn off Your Heating
Spread Towels
Turn Off Radiator Valves
Drain the Radiator
Remove & Flush Radiator
Reconnect Your Radiator
Again, we must stress we would not recommend carrying out this process yourself. There are in-depth instructions below on what the process consists off, which demonstrates why this is best completed by a plumber.
Towels/Sheets to Protect Carpets/Flooring from Water Damager
Radiator Bleed Key
Wrenches
Bucket to Collect Excess Water
Garden Hose
Before a radiator can be removed from the wall, the heating system must be turned off. Once the system is turned off, you should wait around 1 Hour 30 Minutes to allow the water within the radiators to cool. If you come into contact with the water whilst it is still hot, this could result in serious injury.
There is a good chance that some water will spill from the radiators during this process. Protect your floors by spreading out towels around the radiator and beneath the valves.
At this point, you'll need to isolate the radiator from the rest of the heating system.
Turn off the thermostatic radiator valve (TRV) by twisting it to the '0' or 'off' position. Once this has been done, the lockshield valve then also needs to be turned off. Remove the plastic cap then use a wrench to turn the valve off. (This will be clockwise.)
When turning off the lockshield valve, ensure that you note down how many turns this took. This will mean you can effectively re-balance your radiators later on.
To Bleed the radiator, place your bucket underneath the thermostatic radiator valve before progressing any further.
Place the wrench onto the valve, use the other wrench to loosen the nut that joins the radiator to the valve.
Use a bleed key to open the bleed valve on the radiator, this will then allow the air in, which will in consequently help the water flow out of the unit.
Collect anything that comes out of your radiator into your bucket.
Close the radiator bleed valve with the key.
This can prove the be the tricky part.
Once no more water is flowing out the radiator, you need to remove the unit from the brackets. Keep your bucket to hand, as when you tilt the radiator some more liquid/sludge may escape.
At this point, your radiator should be completely off the wall. Take the unit outside to flush it. This is where your garden hose is needed. Place the hose on the radiator inlet, turn on the water and and flush out all the sludge inside. Continue to do this until the water escaping is completely clear.
To put it simply, repeat the steps above in reverse order.
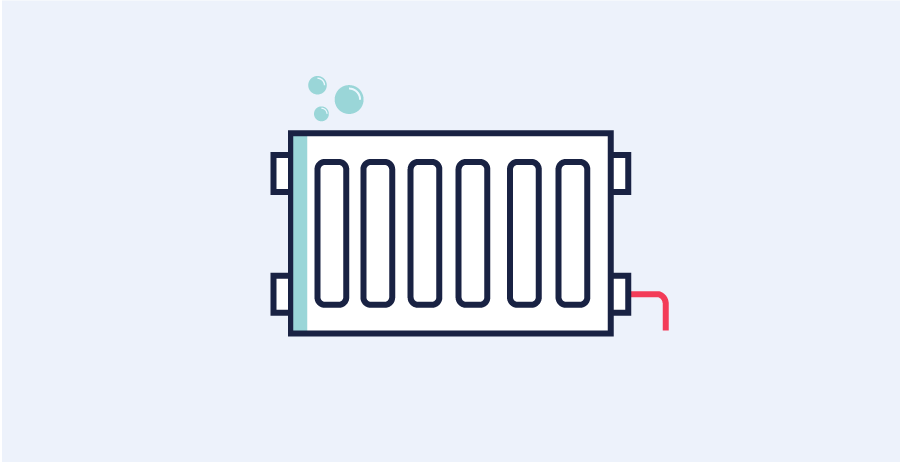
If your radiator is cold at the top, it most likely needs bleeding. When people don’t turn on their heating for long periods of time such as during Summer, this can cause air bubbles to get trapped inside the radiators.
Because the bubbles rise, the air accumulates at the top of the radiator, making it gradually become cooler.
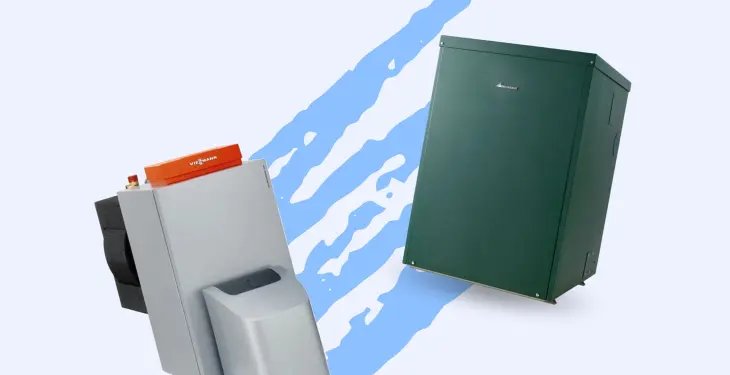
If your boiler is over 10 years old, it is quite likely that this is the cause behind your high energy bills. This is because the older your boiler gets, the less efficient it becomes.
According to The Energy Saving Trust, an A-rated boiler could potentially save you £315 a year. Click here for a fixed quote on a new boiler installation.
If your boiler pressure has fallen, your boiler will require more fuel to reach the same amount of heat, therefore costing you more.
It’s quick and simple to top up the pressure and instruction on how to do so can usually be found in the manufacturers guide. Alternatively, you can read this helpful guide on how to top up your boiler pressure by iHeat.
Learning how to control your heating system’s settings to deliver optimum temperature in accordance to your lifestyle can also save you lots of money on your bills.
The Centre for Sustainable Energy recommends programming your boiler to turn the heating on 30 minutes before you wake up in the morning but at a lower temperature.
By reducing your room temperature by just 1°C, a change you may not even notice, you could potentially cut your bills by up to £75 a year in an average home. Public Health England suggests 18°C as the minimum temperature of your living room.
Get a quote in 60 seconds, fitted as fast as next day!
0% APR finance available.
Almost a third of heat lost in uninsulated homes escapes through the loft/roof. Insulating your home can reduce this heat loss and save you up to £160 a year on energy bills.
Last updated: 11th December, 2025
Written by Stephen Day
Gas Safe Engineer at iHeat
Stephen Day is a Gas Safe registered and FGAS certified engineer with over 20 years of hands-on experience in the heating, cooling, and renewable energy industry, specialising in boiler installations, air conditioning, and heat pump systems.
LinkedInArticles by Stephen Day are reviewed by iHeat’s technical team to ensure accuracy and reliability.
13th July, 2026
Various benefits come from having an oil boiler installed in your home, and this could be...

13th July, 2026
As Vaillant continues to innovate, integrating smart technology and improving energy perfo...

10th July, 2026
Compare Worcester Bosch combi boiler models, typical installed prices and warranty options...
No obligation. Takes less than 60 seconds.


