Facebook pixel
new boiler

Get a new boiler

Fixed price boilers, next day

See boiler prices
new air conditioning

Air Conditioning

Get a quote
new heat pump

Heat Pumps

Coming soon

new ev charger

EV Chargers

Get a quote
boiler servicing

Boiler Servicing

Get a quote

Last updated: 20th August, 2024

Guides

Radiator Lockshield Valve - Leaking Issues and Fixes Explained

Radiator Lockshield Valve - Leaking Issues and Fixes Explained

Key takeaways

  • Know the function of a lockshield valve in heating systems.
  • Identify the root cause of a leaking lockshield valve.
  • Repair leaks with essential tools or call a professional if needed.

A lockshield valve is an important part of a radiator system. It helps to control the water flow through the radiator. Located on the opposite side from the on/off valve, it can often be recognised by its small white plastic cap.

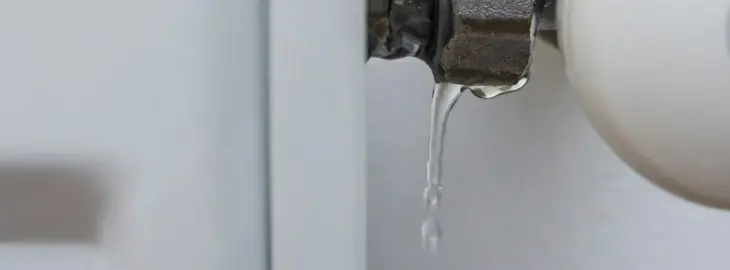
Radiator lockshield valve leaks can be a common issue in many homes, especially in central heating systems. These valves are crucial for controlling the flow of hot water through radiators, ensuring an even distribution of heat. A leaking lockshield valve can lead to wasted water and reduced heating efficiency.

Identifying the source of the leak is the first step toward fixing the problem. It could be due to a loose union nut, a worn-out packing gland, or even an issue with the pipework. Having the right tools and know-how makes the repair process easier and helps avoid calling a professional.

Engaging with the problem early can save money and prevent further damage to the heating system. Following a step-by-step guide to fix the leak ensures the system runs smoothly and effectively. With some basic tools and a bit of patience, most homeowners can manage this repair themselves.

Need a new boiler?

Get a quote in 60 seconds, fitted as fast as next day!
0% APR finance available.

Get a quote

What Does A Lockshield Valve Do?

A lockshield valve is an important part of a radiator system. It helps to control the water flow through the radiator. Located on the opposite side from the on/off valve, it can often be recognised by its small white plastic cap.

When adjusting lockshield valves, the aim is to manage how much hot water enters the radiator. This ensures each radiator in a home heats up evenly. Without proper adjustment, some radiators might become too hot, while others stay cold.

Lockshield valves connect the radiator to the return pipe that leads back to the boiler. By controlling the flow, they help maintain the efficiency of the heating system. This is vital for ensuring the heating is both effective and energy-efficient.

Balancing the radiators involves adjusting the lockshield valves. This process starts with the radiator that heats up the fastest. Closing the valve and then opening it slightly helps control the water distribution. Correct adjustment keeps the heating system balanced and increases its efficiency.

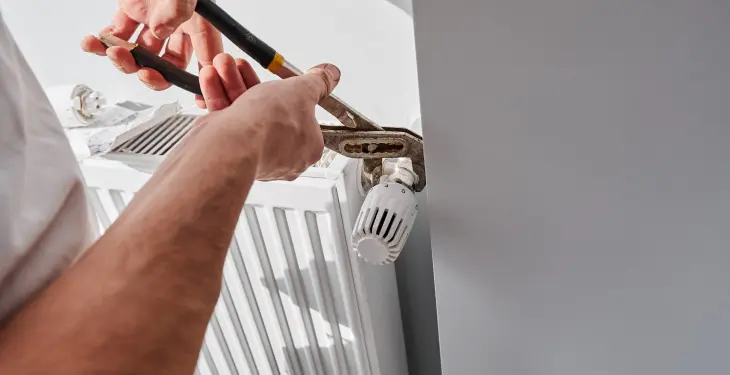
In the context of managing a leaking lockshield valve, these valves sometimes need tightening. A common fix is to check and tighten the union nut where the valve connects to the pipe. Ensuring the valves are secured can prevent leaks and maintain proper water flow.

By keeping all radiator valves, including lockshield valves, well-maintained, homeowners can ensure their heating systems work optimally, leading to consistent indoor temperatures and potential energy savings.

Identifying The Source Of A Lockshield Valve Leak

First, check the lockshield valve. A common reason for leaks is a loose union nut. Slight movements can break the seal, needing just a simple tightening. Always start here to see if a quick fix is all that's needed.

Inspect the gland. The valve's packing gland might have aged or become damaged. Look for signs of moisture around the gland. If there's rust or corrosion, this could be the leak's source.

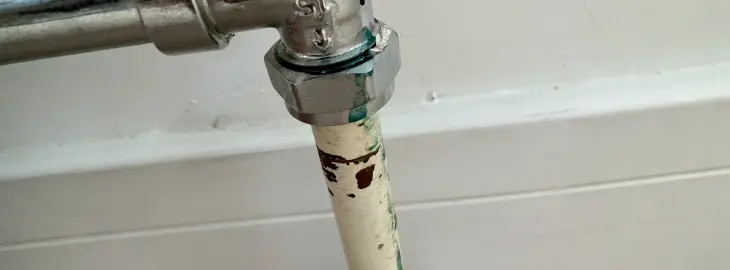
Examine the pipe joint. Connections between the radiator and pipes might lose their seal due to wear. Bend or twist gently to see if water escapes. PTFE tape can help fix leaks here.

Check the valve cap and cover. These parts can hide smaller leaks. Older radiators might have worn caps, which don't seal well. Remove the covers to inspect the valve body for signs of leakage.

Lastly, don't forget the radiator itself. High moisture at the base might point to a radiator leak rather than just the valve. Surface rust or weak spots in the metal can cause small leaks to form and spread.

Problem Area

Signs to Look For

Possible Actions

Union Nut

Loose fit, moisture

Tighten with a spanner

Packing Gland

Rust, corrosion, visible moisture

Tighten or replace the gland

Pipe Joint

Wet spots, movement

Apply PTFE tape, tighten connections

Valve Cap & Cover

Hidden moisture, old/worn caps

Inspect and replace if necessary

Radiator Body

Rust, wet patches on radiator

Repair or replace leaking section

By carefully inspecting these areas, they can pinpoint and fix any leaking radiator valve issues, ensuring the system runs smoothly.

Essential Tools For Fixing A Leaking Lockshield Valve

When tackling a leaking lockshield valve, having the right tools makes all the difference. Here are the essential items you need:

1. Spanner and Adjustable Spanner: To tighten or loosen nuts, a spanner is crucial. An adjustable spanner provides flexibility for various nut sizes.

2. PTFE Tape: This tape helps in creating a watertight seal around the threads. Wrap it around the thread to avoid leaks.

3. Towels and Tissue: Keep a few towels and tissues handy to mop up any spilled water quickly.

4. Olive and Washers: Sometimes, the olive or rubber washer inside the valve needs replacement. These create a snug fit and prevent leaks.

5. Radiator Key: This key is essential for bleeding the radiator, releasing trapped air, and lowering the water pressure.

6. Bucket and Bowl: Place a bucket or bowl under the valve to catch any water that might escape during the repair.

7. Thread Sealant: For a more rigid solution than PTFE tape, thread sealant can be used to ensure a tight and leak-proof fitting.

Having these tools at the ready makes the task straightforward and efficient. Following these steps will help keep your radiator system running smoothly. Keep your workspace organised and you'll handle any leak with ease.

Step-By-Step Guide To Fixing A Leaky Lockshield Valve

Fixing a leaky lockshield valve involves several steps, focusing on different types of leaks such as at the packing nut, union nut, and pipework connections. Proper tools and careful execution are essential to restore the valve's function.

Fixing A Leaky Packing Nut

A leaky packing nut can often cause issues. The packing nut sits just below the valve handle. If it loosened over time, water can seep through. To repair, try gently tightening it first.

Tools Needed:

  • Spanner

  • PTFE tape

Steps:

  1. Use the spanner to tighten the nut slightly.

  2. If the leak continues, apply PTFE tape around the thread for a better seal.

  3. Tighten the nut again and check for leaks.

How To Tighten A Packing Nut

Tightening a packing nut can often stop minor leaks. This is a simple process, requiring basic tools.

Tools Needed:

  • Adjustable spanner

Steps:

  1. Locate the packing nut below the valve handle.

  2. Grip the nut with the spanner.

  3. Turn the spanner clockwise to tighten.

  4. Check for any ongoing leaks.

If the leak persists even after tightening, consider repacking the nut.

Repacking A Leaky Packing Nut

Repacking involves adding new packing material, like PTFE tape, to seal the leak effectively.

Tools Needed:

  • PTFE tape

  • Adjustable spanner

Steps:

  1. Turn off the water supply.

  2. Unscrew the packing nut using a spanner.

  3. Wrap PTFE tape around the valve spindle.

  4. Reassemble the nut, tightening it securely.

  5. Turn the water back on and check for leaks.

Replacing A Worn-Out Packing Nut

Sometimes, the packing nut may be too worn out to be fixed by tightening or repacking. Replacing it might be necessary.

Tools Needed:

  • Replacement packing nut

  • Adjustable spanner

  • PTFE tape

Steps:

  1. Shut off the water supply.

  2. Remove the old packing nut with a spanner.

  3. Wrap PTFE tape around the valve spindle.

  4. Screw on the new packing nut and tighten it.

  5. Turn the water back on and inspect for leaks.

Fixing A Leak In The Pipework To Valve Connection

Leaks at the pipework connection are common and occur where the pipe meets the valve.

Tools Needed:

  • Adjustable spanner

  • PTFE tape

Steps:

  1. Turn off the water supply.

  2. Unscrew the union nut connecting the pipe to the valve.

  3. Apply PTFE tape to the pipe threads.

  4. Reconnect and tighten the union nut with a spanner.

  5. Turn on the water supply and check for any leaks.

How To Tighten A Leaky Union Nut

A leaky union nut can usually be fixed by tightening it. This fastening method can often become loose over time.

Tools Needed:

  • Adjustable spanner

Steps:

  1. Locate the union nut where the pipe connects to the valve.

  2. Use the spanner to turn the nut clockwise.

  3. Ensure it is snug but avoid over-tightening to prevent damage.

  4. Monitor for any further leaks.

How To Bleed A Radiator And Fix A Leaking Union Nut

Bleeding a radiator can remove trapped air and improve efficiency, and sometimes a leak around the union nut also needs attention.

Tools Needed:

  • Radiator key

  • Adjustable spanner

  • PTFE tape

Steps:

  1. Turn off the heating system.

  2. Use the radiator key to open the bleed valve and release air.

  3. Close the bleed valve once water starts to emerge.

  4. Locate and tighten the leaky union nut with a spanner.

  5. If necessary, apply PTFE tape to reinforce the seal.

  6. Turn on the heating system and check for leaks.

This guide provides detailed steps to address leaks in different parts of a lockshield valve. Proper maintenance can ensure the longevity and proper function of the heating system.

How To Repair A Leak Between Valve And Radiator

Repairing a leak between the valve and the radiator involves tightening the union nut and sealing the joint with PTFE tape. These steps ensure a secure connection and prevent further leakage.

Steps To Tighten The Union Nut

Tightening the union nut is the first step to address a leak between the valve and the radiator. A loose union nut can cause water to seep out. Perform the following:

  1. Turn off the heating system: Ensure the radiator is cool to prevent burns.

  2. Locate the union nut: This is where the valve connects to the radiator.

  3. Use a wrench: Fit the wrench onto the union nut and turn it clockwise. Make sure not to over-tighten, as this could damage the threads.

  4. Check for leaks: Once tightened, observe the area to see if the leak persists.

If the leak stops, this simple fix might be all that's needed.

How To Drain A Radiator And Seal The Joint

If tightening the union nut doesn't solve the issue, the radiator may need to be drained and the joint sealed. Follow these steps:

  1. Turn off the radiator valves: Close both the lockshield and wheelhead valves to isolate the radiator.

  2. Place a bucket underneath: Position a bucket or container beneath the valve to catch any draining water.

  3. Open the bleed valve: Using a bleed key, open the bleed valve at the top of the radiator to release pressure.

  4. Drain the radiator: Loosen the union nut and allow water to drain out completely.

  5. Remove the valve: Carefully detach the valve from the pipework and radiator.

  6. Apply PTFE tape: Wrap PTFE tape around the threads of the valve. This helps create a watertight seal.

  7. Reattach the valve: Screw the valve back onto the radiator, ensuring it is secure.

  8. Refill the radiator: Close the bleed valve, reopen the radiator valves, and allow the radiator to fill with water.

Check the joint for leaks once the system is back to normal. This method ensures a tighter seal and usually resolves any persistent issues.

When To Call A Professional For A Lockshield Valve Leak

If you're dealing with a leaking lockshield valve, sometimes calling a professional is the best move. Here are some situations when it's wise to get expert help:

DIY Fails

If a temporary fix doesn't hold, it's time to call a plumber or heating engineer. They have the skills and tools to perform a permanent repair.

Major Water Damage

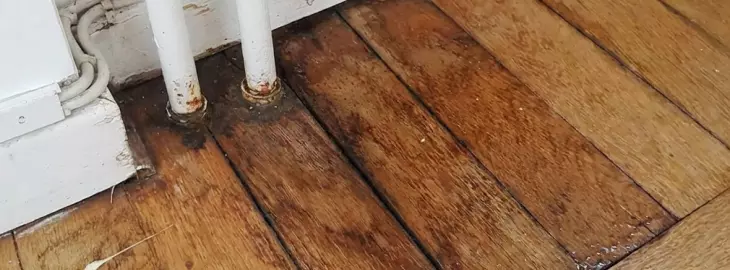
Water damage from a persistent leak can cause serious problems. If you notice damp walls or floors, seeking professional help can prevent further issues.

Complicated Leaks

Leaks from the valve to the radiator union nut or the pipework to the valve union nut can be tricky. Professional expertise ensures proper diagnosis and repair.

Emergency Situations

If the leak seems out of control or the water flow cannot be stopped, treat it as an emergency. An expert can quickly manage the situation, minimising damage.

Lack of Experience

If you're not experienced with plumbing or heating systems, attempting to fix a lockshield valve might cause more harm than good. A professional can handle it efficiently.

Need a new boiler?

Get a quote in 60 seconds, fitted as fast as next day!
0% APR finance available.

Get a quote

Frequently Asked Questions

Should the lockshield valve be fully open?

No, the lockshield valve should not be fully open. It is used to balance the radiator system by controlling the flow of hot water into the radiator. Adjust it slightly to ensure each radiator heats evenly.

Why is the lockshield valve leaking?

Leaks can occur because of a loose union nut, worn-out packing gland, or damaged spindle. Tightening the nuts and replacing worn parts can often stop these leaks.

What happens if a lockshield valve is fully closed?

If fully closed, the radiator will not heat up. This valve regulates water flow, and closing it completely will stop hot water from entering the radiator, making it cold.

Which way do you close a lockshield?

To close a lockshield valve, turn it clockwise (to the right). A valve key, spanner, or wheelhead valve cap may be needed if the valve is stiff.

How does one reseal a leaky radiator bleed valve at the top?

To reseal a leaky bleed valve, first close both radiator valves or drain the system. Then use a bleed key to open the bleed screw. Add jointing compound or wrap PTFE tape around the threads before refitting the screw.

How to change a radiator lockshield valve without draining the system?

Freeze the pipes using a pipe freezing kit to temporarily stop the water flow. Remove the old valve carefully and replace it with the new one. Ensure all connections are sealed properly before thawing the pipes.

How do you free a stuck lockshield valve?

Apply penetrating oil to the valve and wait for it to work. Use a valve key or spanner to gently turn the valve open and closed several times until it moves freely. Avoid using excessive force to prevent damage.

Stephen Day profile photo
Article by
Stephen Day | Co-founder
Gas Safe registered and FGAS certified engineer with over 20 years experience in the heating and cooling industry.