

Written by Stephen Day
Gas Safe Engineer
Updated: 20th May, 2026
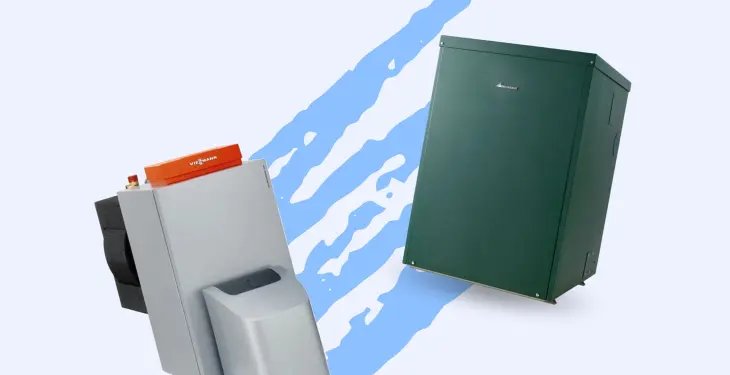
Connecting a wireless thermostat to a boiler can help improve heating efficiency and control. Follow these basic steps to achieve a seamless connection.
Get a new boiler quote, save up to £550 per year (0% APR available).
Connecting a wireless thermostat to your boiler can significantly enhance your home's heating efficiency and provide greater control over your energy usage.
This guide walks you through the simple steps of connecting your wireless thermostat, ensuring a seamless and hassle-free installation process.
Whether you're a homeowner looking to upgrade your heating system or simply curious about the benefits of wireless thermostats, this article offers valuable insights and practical tips.
Wireless thermostats communicate with your boiler through Wi-Fi, radio frequency, or Bluetooth, making it convenient to manage your heating from anywhere in your home.
By understanding the process and requirements, you can confidently install your thermostat and enjoy the advantages of smart heating technology, such as improved energy efficiency and customisable heating schedules.
Curious about the installation process and the tools you'll need? This guide covers everything—from preparing for installation to programming your heating schedule and troubleshooting common issues. Dive in to learn how to make your home heating smarter and more efficient.
Get a quote in 60 seconds, fitted as fast as next day!
0% APR finance available.
A wireless thermostat is a device that controls your home’s heating system without the need for wired connections. It communicates with the boiler using technologies like Wi-Fi, radio frequency, or Bluetooth. By setting the desired temperature, the thermostat sends signals to the boiler to turn on or off, maintaining a comfortable temperature in your home.
Wireless thermostats are often part of smart home systems. These smart thermostats can be controlled remotely using a smartphone or tablet. This allows homeowners to manage temperature settings even when they are not at home.
One of the primary benefits of a wireless thermostat is energy efficiency. By optimising heating schedules and adjusting temperatures based on your routine, a wireless thermostat can help reduce energy consumption. This leads to energy savings and can lower utility bills.
Smart thermostats also provide detailed insights into energy usage. They can display historical data and suggest changes to improve energy efficiency. Many smart thermostats learn from your behaviour, automatically adjusting the temperature to suit your preferences.
Remote control is another key feature of wireless thermostats. Users can change settings from anywhere, ensuring that the home is warm when they arrive and cooler when they leave. This level of control contributes to overall convenience and energy saving.
In summary, wireless thermostats offer an advanced way to manage home heating, combining technology and convenience to enhance comfort and efficiency.
A wireless thermostat helps control the temperature in a home without needing wires connecting it to the boiler.
Thermostat Unit
This device measures the room temperature.
If the temperature is below the set level, it sends a signal to the boiler to turn on the heat.
Receiver Module
Connected directly to the boiler.
Receives signals from the thermostat to either start or stop the heating.
Communication
Uses radio frequency (RF) to send signals between the thermostat and the receiver.
Some models use Wi-Fi for additional features like remote control via a smartphone app.
Installation and Pairing
The receiver is wired to the boiler's control circuit.
The thermostat is paired with the receiver.
Pairing is often done by pressing specific buttons on both devices.
Placement
Place the thermostat in a central location.
Avoid draughty spots or direct sunlight for accurate readings.
Efficiency
Helps save energy by only heating when needed.
Provides more precise control over home heating.
Wireless thermostats can vary greatly in price. Generally, they range from around £50 to £200.
Basic models tend to be on the lower end of the scale. These often cost between £50 and £80. They offer essential functions like setting a target temperature and basic scheduling.
Mid-range wireless thermostats typically cost between £80 and £150. These models may have features like smartphone control, more advanced scheduling, and energy usage reports.
High-end wireless thermostats can cost between £150 and £200 or more. They usually offer advanced features such as:
Learning Capabilities: They adjust settings based on your habits.
Smart Home Integration: Compatible with other smart home devices.
Geofencing: They adjust settings based on your location.
Several factors can affect the price of a wireless thermostat:
Brand: Well-known brands like Nest and Honeywell tend to be more expensive.
Features: More features generally mean a higher price.
Compatibility: Models compatible with a variety of boilers or smart home systems can be pricier.
Here's a quick comparison table:
Type | Price Range | Features |
Basic | £50 - £80 | Essential functions, basic scheduling |
Mid-Range | £80 - £150 | Smartphone control, advanced scheduling |
High-End | £150 - £200+ | Learning capabilities, smart home integration, geofencing |
Choosing a wireless thermostat depends on your needs and budget. Basic models suffice for simple control, while high-end models offer convenience and smart features.
Connecting a wireless thermostat to a boiler can help improve heating efficiency and control. Follow these basic steps to achieve a seamless connection.
1. Gather Equipment:
Wireless thermostat kit: Contains receiver and thermostat.
Screwdrivers: For wiring and mounting.
Drill: If mounting on the wall.
2. Turn Off Power: Switch off the boiler and the main power supply for safety.
3. Locate Existing Thermostat Wires: Find the wires from the current thermostat connecting to the boiler's control circuit.
4. Install the Receiver: Connect the receiver to the existing thermostat wires. Follow the manufacturer’s wiring diagram.
5. Mount the Receiver: Place the receiver near the boiler, ensuring it's not in a draughty area or near windows.
6. Connect the Wireless Thermostat: Turn the boiler and power supply back on. Sync the thermostat with the receiver following the instructions.
Most systems use Wi-Fi, radio frequency, or Bluetooth to communicate.
7. Test the System: Set a temperature and check if the boiler responds to the thermostat signals. Adjust the thermostat location if necessary for optimal performance.
Use these simple steps to connect your wireless thermostat and enjoy enhanced control over your home's heating system.
Before installing a wireless thermostat, it's essential to ensure compatibility with your boiler, choose a central location for the thermostat, and gather all necessary tools and materials.
The first step is to verify if your boiler is compatible with a wireless thermostat. Most modern boilers are designed to work with these devices, but it's always good to check the manufacturer's instructions.
Find your boiler's model number and look it up online or in the documentation to see if it supports wireless thermostats. Older boilers may require additional equipment or may not support wireless technology at all.
Understanding the wiring setup is crucial. Identify the existing thermostat wiring on your boiler, typically a pair of wires running to the control circuit. If unsure, consult a professional to avoid any safety risks.
Selecting the best location for the thermostat is important for accurate temperature readings. The thermostat should be placed in a central location within the house, away from any direct sources of heat or cold such as radiators, windows, or doors.
Avoid placing the thermostat in a draughty area or near a window where the temperature readings may be affected. Also, ensure there are minimal walls between the boiler and the receiver to maintain a good wireless connection.
Mounting the thermostat on an interior wall can help maintain consistent temperature readings, providing better control over your heating system.
You need the right tools and materials before starting the installation to ensure a smooth process. Common tools required include:
Screwdrivers: Both flathead and Phillips
Wire strippers: For preparing the wiring
Drill with bits: To mount the thermostat
Level: To ensure the thermostat is mounted straight
Multimeter: To check electrical connections
Additionally, keep the installation manual handy to follow specific steps and safety guidelines provided by the thermostat and boiler manufacturers.
Always turn off the power supply to the boiler before beginning any wiring work to avoid electrical hazards. Having everything ready will make the installation process quicker and safer.
Connecting a wireless thermostat to a boiler involves installing the receiver, wiring it to the boiler, and setting up the thermostat. This process ensures your heating system operates efficiently.
The first step is to install the receiver. This device communicates between the thermostat and the boiler. Find an appropriate location near the boiler with minimal obstructions for the best signal. Attach the receiver using screws or adhesive, following the manufacturer's guidelines.
Ensure that the receiver's power source is accessible. Some receivers require batteries, while others plug directly into a power outlet. Ensure the receiver is securely mounted and not in a draughty or damp area. Check if the receiver needs to be on a flat surface to function properly.
Now, it's time to connect the receiver to the boiler. Locate the existing thermostat wiring on your boiler. This is typically a pair of wires that run to the boiler's control circuit. Turn off the power to the boiler to ensure safety.
Next, use the instructions provided with your thermostat to connect the wires from the receiver to the boiler's terminals. Make sure the connections are tight to avoid any loose wiring issues. After the wiring is complete, switch the power back on and observe if the receiver powers up correctly.
With the receiver installed, proceed to set up the thermostat. Insert batteries if required and turn on the thermostat. The display screen should activate, indicating it’s ready for pairing. Refer to the instructions on how to pair the thermostat with the receiver. This usually involves pressing a button on the receiver and following instructions on the thermostat's screen.
Place the thermostat in a central location. Avoid areas with direct sunlight, draughts, or near windows, as these can affect temperature readings. Ensure the thermostat is at an appropriate height for accurate temperature sensing. Once paired, you can program your desired temperature settings and schedules.
By carefully following these steps, you can successfully connect your wireless thermostat to your boiler, ensuring a comfortable and energy-efficient home.
You can manage your home's heating schedule through the thermostat interface or a smartphone app. This flexibility helps maintain a comfortable temperature while saving energy.
The thermostat interface allows you to set up and customise heating schedules directly on the device.
To start, navigate to the scheduling menu on the thermostat display. Most models provide daily or weekly scheduling options. You can set different temperatures for specific times of the day, such as morning, afternoon, and night.
For ease of use, many thermostats have preset programmes. These default settings can be adjusted to meet your specific needs. For example, you might set the heating to turn on an hour before you wake up and turn off after you leave for work.
Ensure the thermostat is in auto mode so it follows the schedule you've set. Remember to save any changes to avoid losing your customised settings.
Using a smartphone app adds convenience and flexibility to managing your heating schedule.
Start by downloading the manufacturer’s app on your phone or tablet. After installation, connect the app to your thermostat via Wi-Fi. This connection allows you to control and monitor your heating system remotely.
In the app, navigate to the schedule section. Similar to the thermostat interface, you can create and modify heating schedules. The app often provides additional features, like notifications and energy usage reports.
Adjusting the temperature and settings through the app is straightforward. Simply select the desired times and temperatures, then save the schedule. The app lets you make changes even when you’re not at home, ensuring your heating system is always optimally configured.
After setting up the wireless thermostat, it's important to ensure it’s working correctly and address any potential issues. This section covers key steps to test the system, fix connectivity problems, and check power sources.
To start, turn on the system and set the thermostat to a temperature that will trigger the boiler. Wait and see if the boiler responds as expected. If it does, then the pairing is successful.
Next, adjust the temperature settings to ensure the thermostat is accurately controlling the boiler. Make sure the changes are reflected by the boiler turning on or off within a reasonable timeframe.
For an extra check, try using the thermostat's schedule feature, setting it to different temperatures throughout the day and confirming the boiler reacts accordingly.
If the thermostat isn’t communicating with the boiler, check the distance and potential interference. Ensure there are minimal walls between the thermostat and boiler. Metal objects or other electronic devices can also disrupt the signal.
Move the thermostat closer to the boiler and test again. If this solves the issue, find a suitable permanent location within an effective range. If connectivity problems persist, refer to the thermostat’s manual for any specific recommendations on signal strength and potential interference solutions.
Check the power supply of the thermostat and boiler. Ensure both are receiving adequate power. If the thermostat is battery-operated, replace the old batteries with new ones and see if there's any improvement in performance.
Make sure the receiver connected to the boiler is also powered properly. Sometimes, the issue lies in the receiver not getting enough power, causing communication problems between the thermostat and boiler. Regularly check and maintain the power sources to avoid unexpected disruptions.
Regular maintenance, updating device firmware, and managing batteries are key to ensuring your wireless heating control remains efficient and reliable. These tasks can help save energy and reduce bills by optimising performance.
Regular maintenance is essential to keep your wireless thermostat and boiler working efficiently. Start by cleaning the thermostat screen and any exposed parts to remove dirt and dust.
Check the connections between the thermostat and the boiler receiver to ensure they are secure. If they are loose, it can cause the system to malfunction.
Inspect the boiler and thermostat for any signs of wear or damage. Addressing issues early can prevent more costly repairs.
Keeping the device firmware up to date is crucial for maintaining optimal performance and security. Manufacturers often release updates that can include bug fixes, new features, and improvements in energy management.
To update the firmware, follow the instructions provided by the manufacturer, which can usually be found on their website.
Ensure the thermostat is connected to the internet, as updates are often downloaded automatically. If the device is not connected, you may need to download the update to a USB drive and install it manually.
Battery management is another critical aspect of maintaining your wireless heating control system. Check the battery level in your wireless thermostat regularly to ensure it has enough power.
Replace batteries as needed, typically every 6-12 months. Use high-quality batteries to ensure longer life and better performance.
Some systems may have a low battery warning, but it's a good idea to schedule periodic checks to avoid unexpected power loss. Ensuring the batteries are in good condition helps maintain consistent communication between the thermostat and the boiler, which can lead to better energy savings.
Connecting a wireless thermostat to your boiler can improve your home's heating system by boosting energy efficiency. Wireless thermostats give greater control over temperature settings, helping to maintain a comfortable room temperature.
Energy Efficiency: Modern boilers, such as gas condensing boilers, benefit significantly from wireless thermostats. By optimising the heating schedule, homeowners can reduce energy waste and save money.
Temperature Settings: With a wireless thermostat, you can easily adjust the temperature settings to match your daily routine. This means your heating system only works when needed, ensuring efficient heating without unnecessary energy consumption.
Central Heating Control: Wireless thermostats allow for better central heating control. They help in balancing the heat across different rooms, ensuring a uniform temperature throughout the house.
Energy Saving: By monitoring and adjusting the room temperature, wireless thermostats prevent overheating. This not only saves energy but also extends the lifespan of your boiler.
Hot Water Management: Some advanced models also control hot water schedules, providing another layer of energy saving. This ensures that hot water is available only when required, reducing boiler operation.
Employing a wireless thermostat with a heat-only boiler or other modern boilers enhances the heating system's performance. The combination of better temperature management and energy efficiency leads to significant cost savings and a more comfortable living environment.
Connecting a wireless thermostat to a boiler can improve home heating efficiency and offer easier control through smart devices. Understanding how these systems communicate and integrate with smart home systems helps ensure seamless operation and enhanced convenience.
To connect a wireless thermostat to smart home systems, the user must ensure compatibility with their existing setup. Popular smart home systems like Nest, designed by Google, often support wireless thermostat integration. This involves connecting the thermostat to the home's Wi-Fi network.
Once connected, users can control the thermostat through a smartphone or mobile app. It's essential to connect the thermostat receiver to the boiler’s control circuit. Whether integrating with gas or electric boilers, this connection allows full control of the heating schedule through smart devices.
Most modern wireless thermostats support Wi-Fi, Bluetooth, or radio frequency communication. Users may need to follow specific pairing procedures detailed in the product's manual, such as holding a pairing button until an LED light blinks.
Smart devices like wireless thermostats communicate with each other and the central boiler using network protocols. The primary methods include Wi-Fi and sometimes Ethernet cable connections for stability. Ensuring a stable internet connection helps avoid interference that could disrupt the thermostat's signals.
These devices often require a bridge or hub to act as a middleman between the thermostat and other smart devices. This bridge ensures continuous and reliable communication. For example, the Tado° thermostat uses a bridge to pair and communicate with the boiler.
Users can adjust settings and monitor the system from anywhere using their mobile phone, enhancing the smart home experience. Configuring the heating schedule through an app offers benefits such as energy savings and increased comfort.
When connecting a wireless thermostat to a boiler, it's important to be aware of legal requirements and safety guidelines in the UK. Following these steps ensures compliance with national regulations and helps prevent accidents during installation.
In the UK, certain regulations must be followed when installing or modifying a heating system. Part P of the Building Regulations requires that electrical work in households be carried out by a qualified electrician.
Hiring a Gas Safe registered engineer is crucial when working with gas boilers. This ensures the installation meets safety standards and legal requirements.
Safety checks include:
Testing for gas leaks
Ensuring proper electrical connections
Verifying the system functions correctly
Important reminders:
Switch off power at the main fuse box
Wear protective gear
Follow manufacturer’s guidelines
Using professional services for installation not only aligns with the law but also guarantees the safety and efficiency of your heating system.
Boilers can be a daunting purchase for many people as they’re an appliance with a lot of responsibility, providing heat for you and your family is something you want to get right. Boilers aren’t exactly a quickly disposable item either, potentially lasting you a decade.
Effectively, new boiler cost can be split into two segments: the first is the actual boiler itself (unit price), and the second is the cost of the boiler being installed (set up) in your property by an expert engineer.
Here at iHeat, we remove all of this undue stress and make the decision making process of upgrading to a new central heating system, as easy as possible.
Installation Type | Price (inc VAT) | |
Combi to combi swap | £1,845 | |
System to combi conversion | £2,499 | |
New boiler install | £2,899 | |
Back boiler to a combi | £3,299 | |
System to system | £1,945 |
Last updated: 20th May, 2026
Written by Stephen Day
Gas Safe Engineer at iHeat
Stephen Day is a Gas Safe registered and FGAS certified engineer with over 20 years of hands-on experience in the heating, cooling, and renewable energy industry, specialising in boiler installations, air conditioning, and heat pump systems.
LinkedInArticles by Stephen Day are reviewed by iHeat’s technical team to ensure accuracy and reliability.
13th July, 2026
Various benefits come from having an oil boiler installed in your home, and this could be...

13th July, 2026
As Vaillant continues to innovate, integrating smart technology and improving energy perfo...

10th July, 2026
Compare Worcester Bosch combi boiler models, typical installed prices and warranty options...
No obligation. Takes less than 60 seconds.


